• Home
  • Photography
  • Videos
  • Journal
  • In The Media
Menu

Mjolnir of Bjørn

bjorn@groundtruthtrekking.org
Alaska
(907)-756-1920
Chop wood, haul water - good internet connection when you can find it.

Your Custom Text Here

Mjolnir of Bjørn

  • Home
  • Photography
  • Videos
  • Journal
  • In The Media

Titanium Goat Retrofit

January 14, 2014 Bjørn Olson
IMG_3020.jpg

Long winter expeditions present many challenges. Keeping clothing, sleeping bags and gear dry while underway are a very big concern when the option to come inside and dry out is not available for weeks at a time. Over the years I have employed many techniques to keep moisture to a minimum but none will be as effective as having a small wood-burning stove in the shelter.


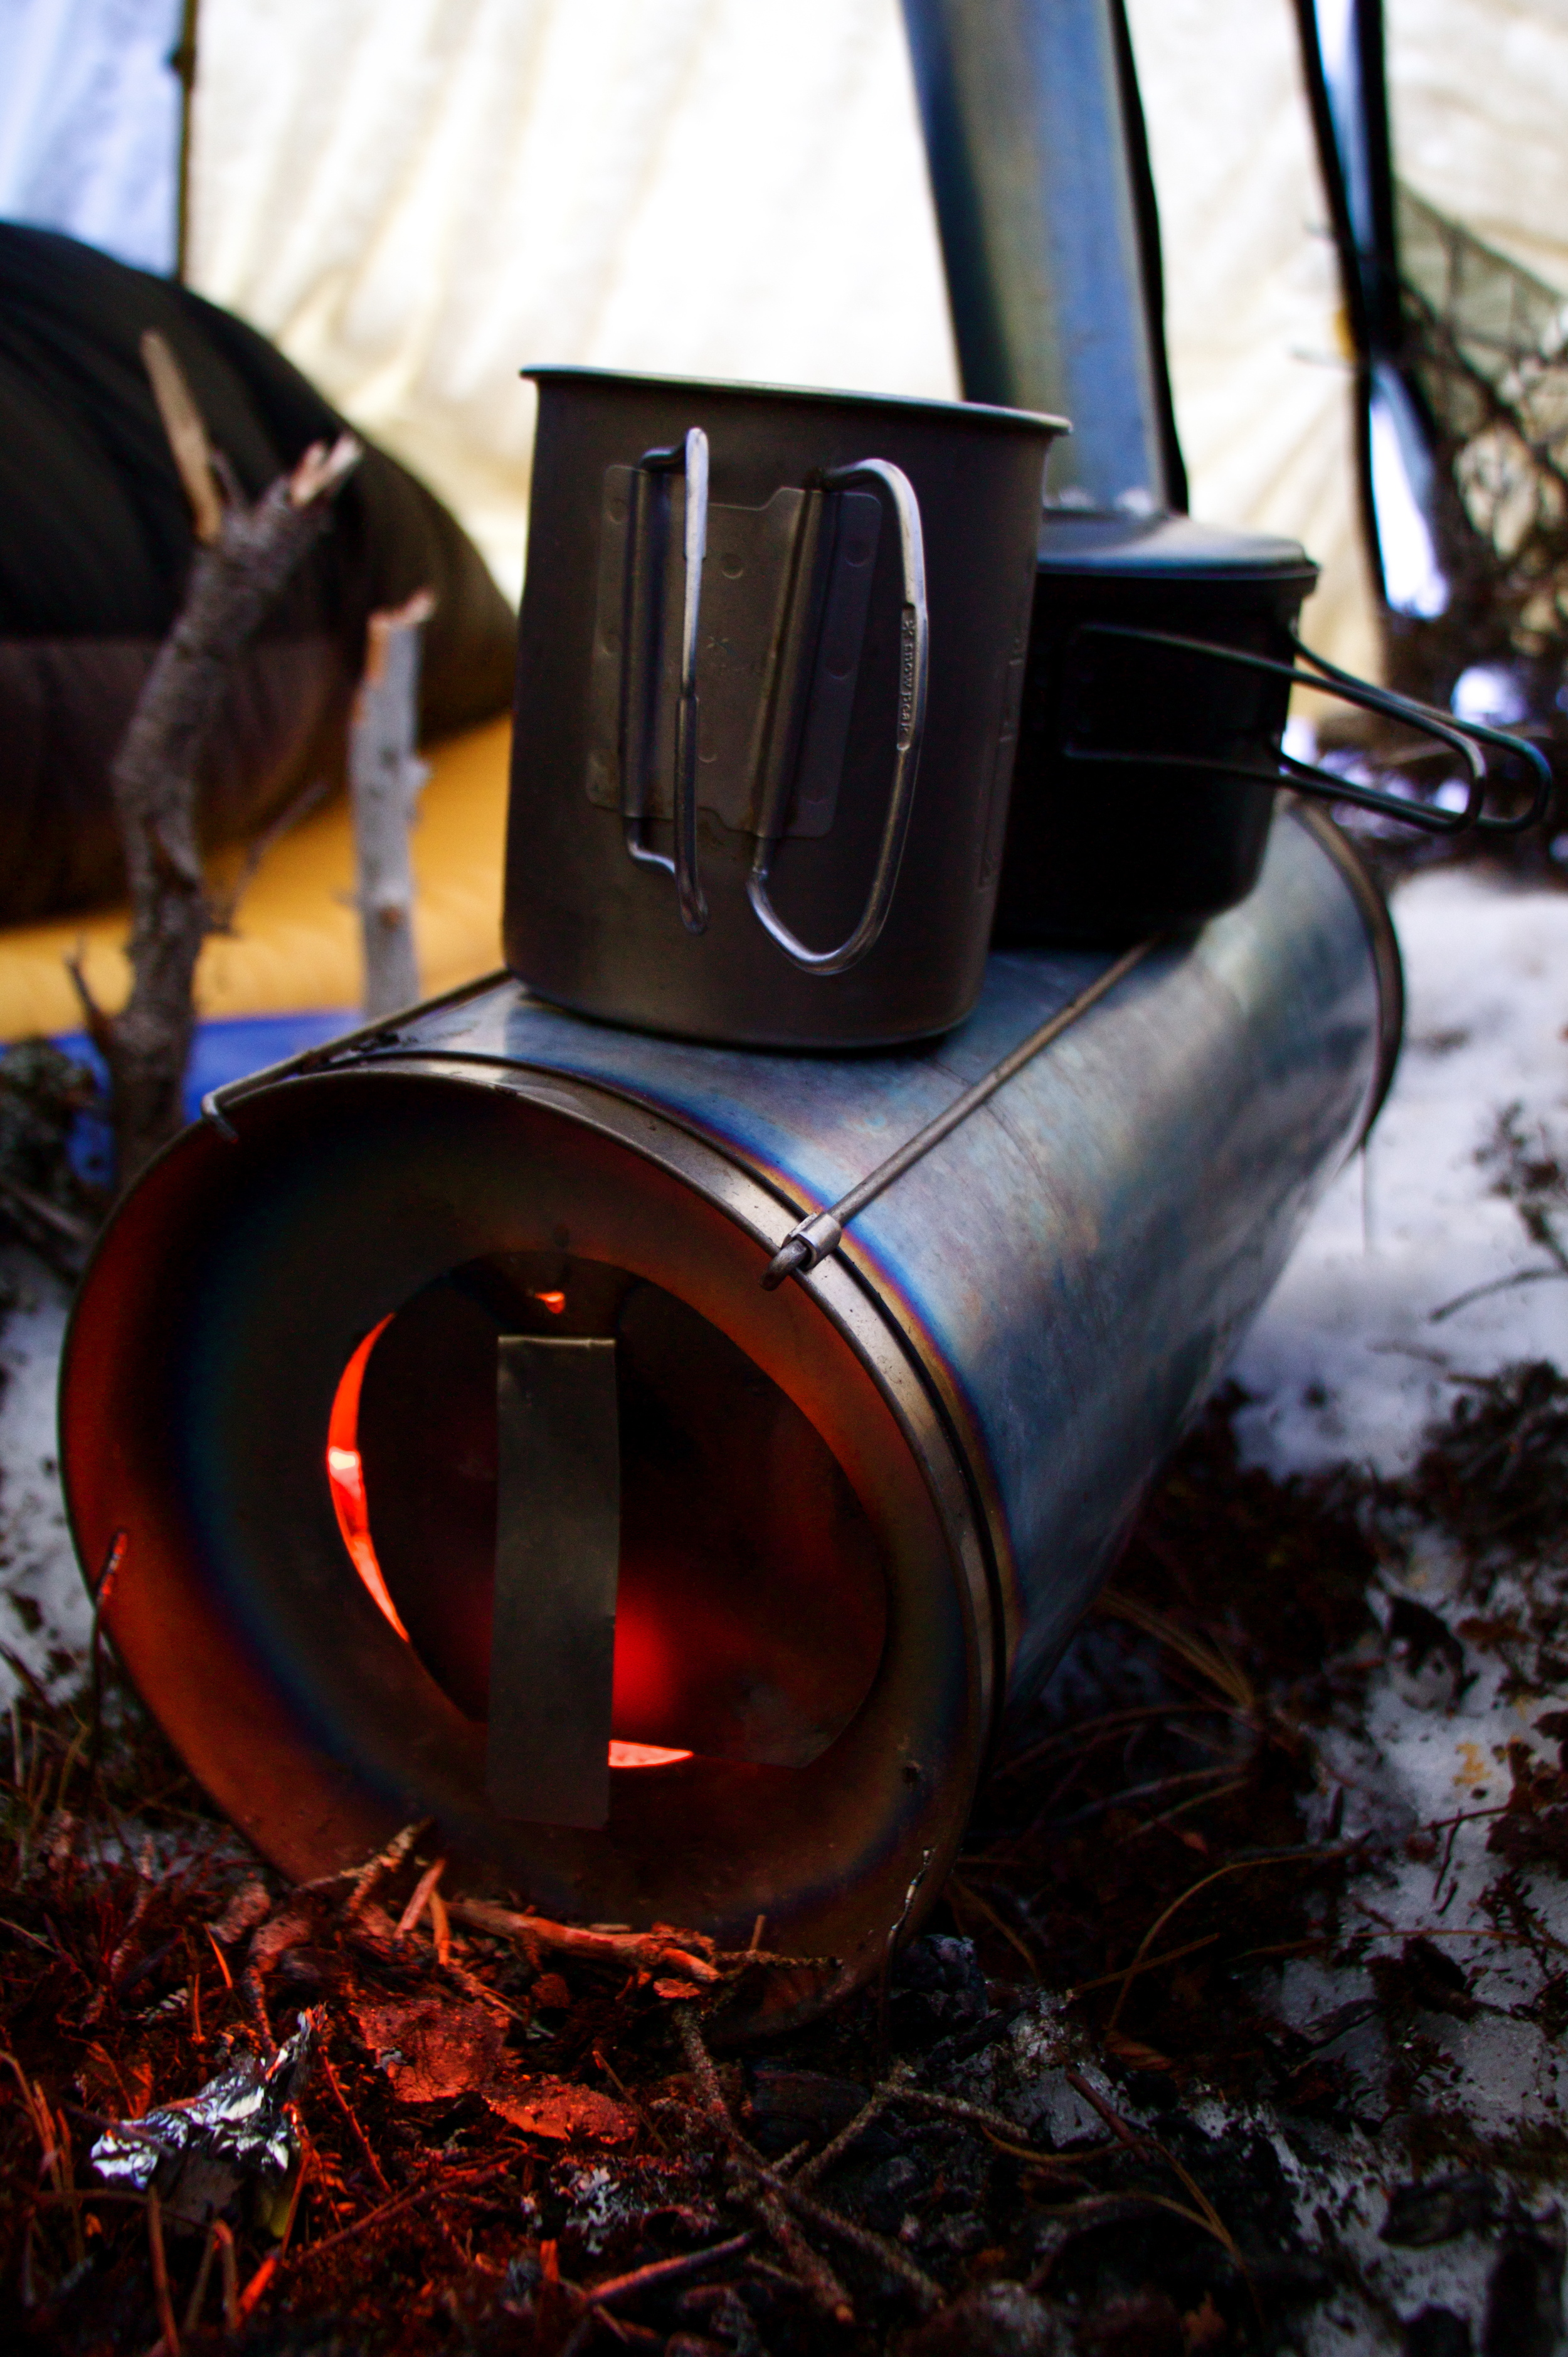
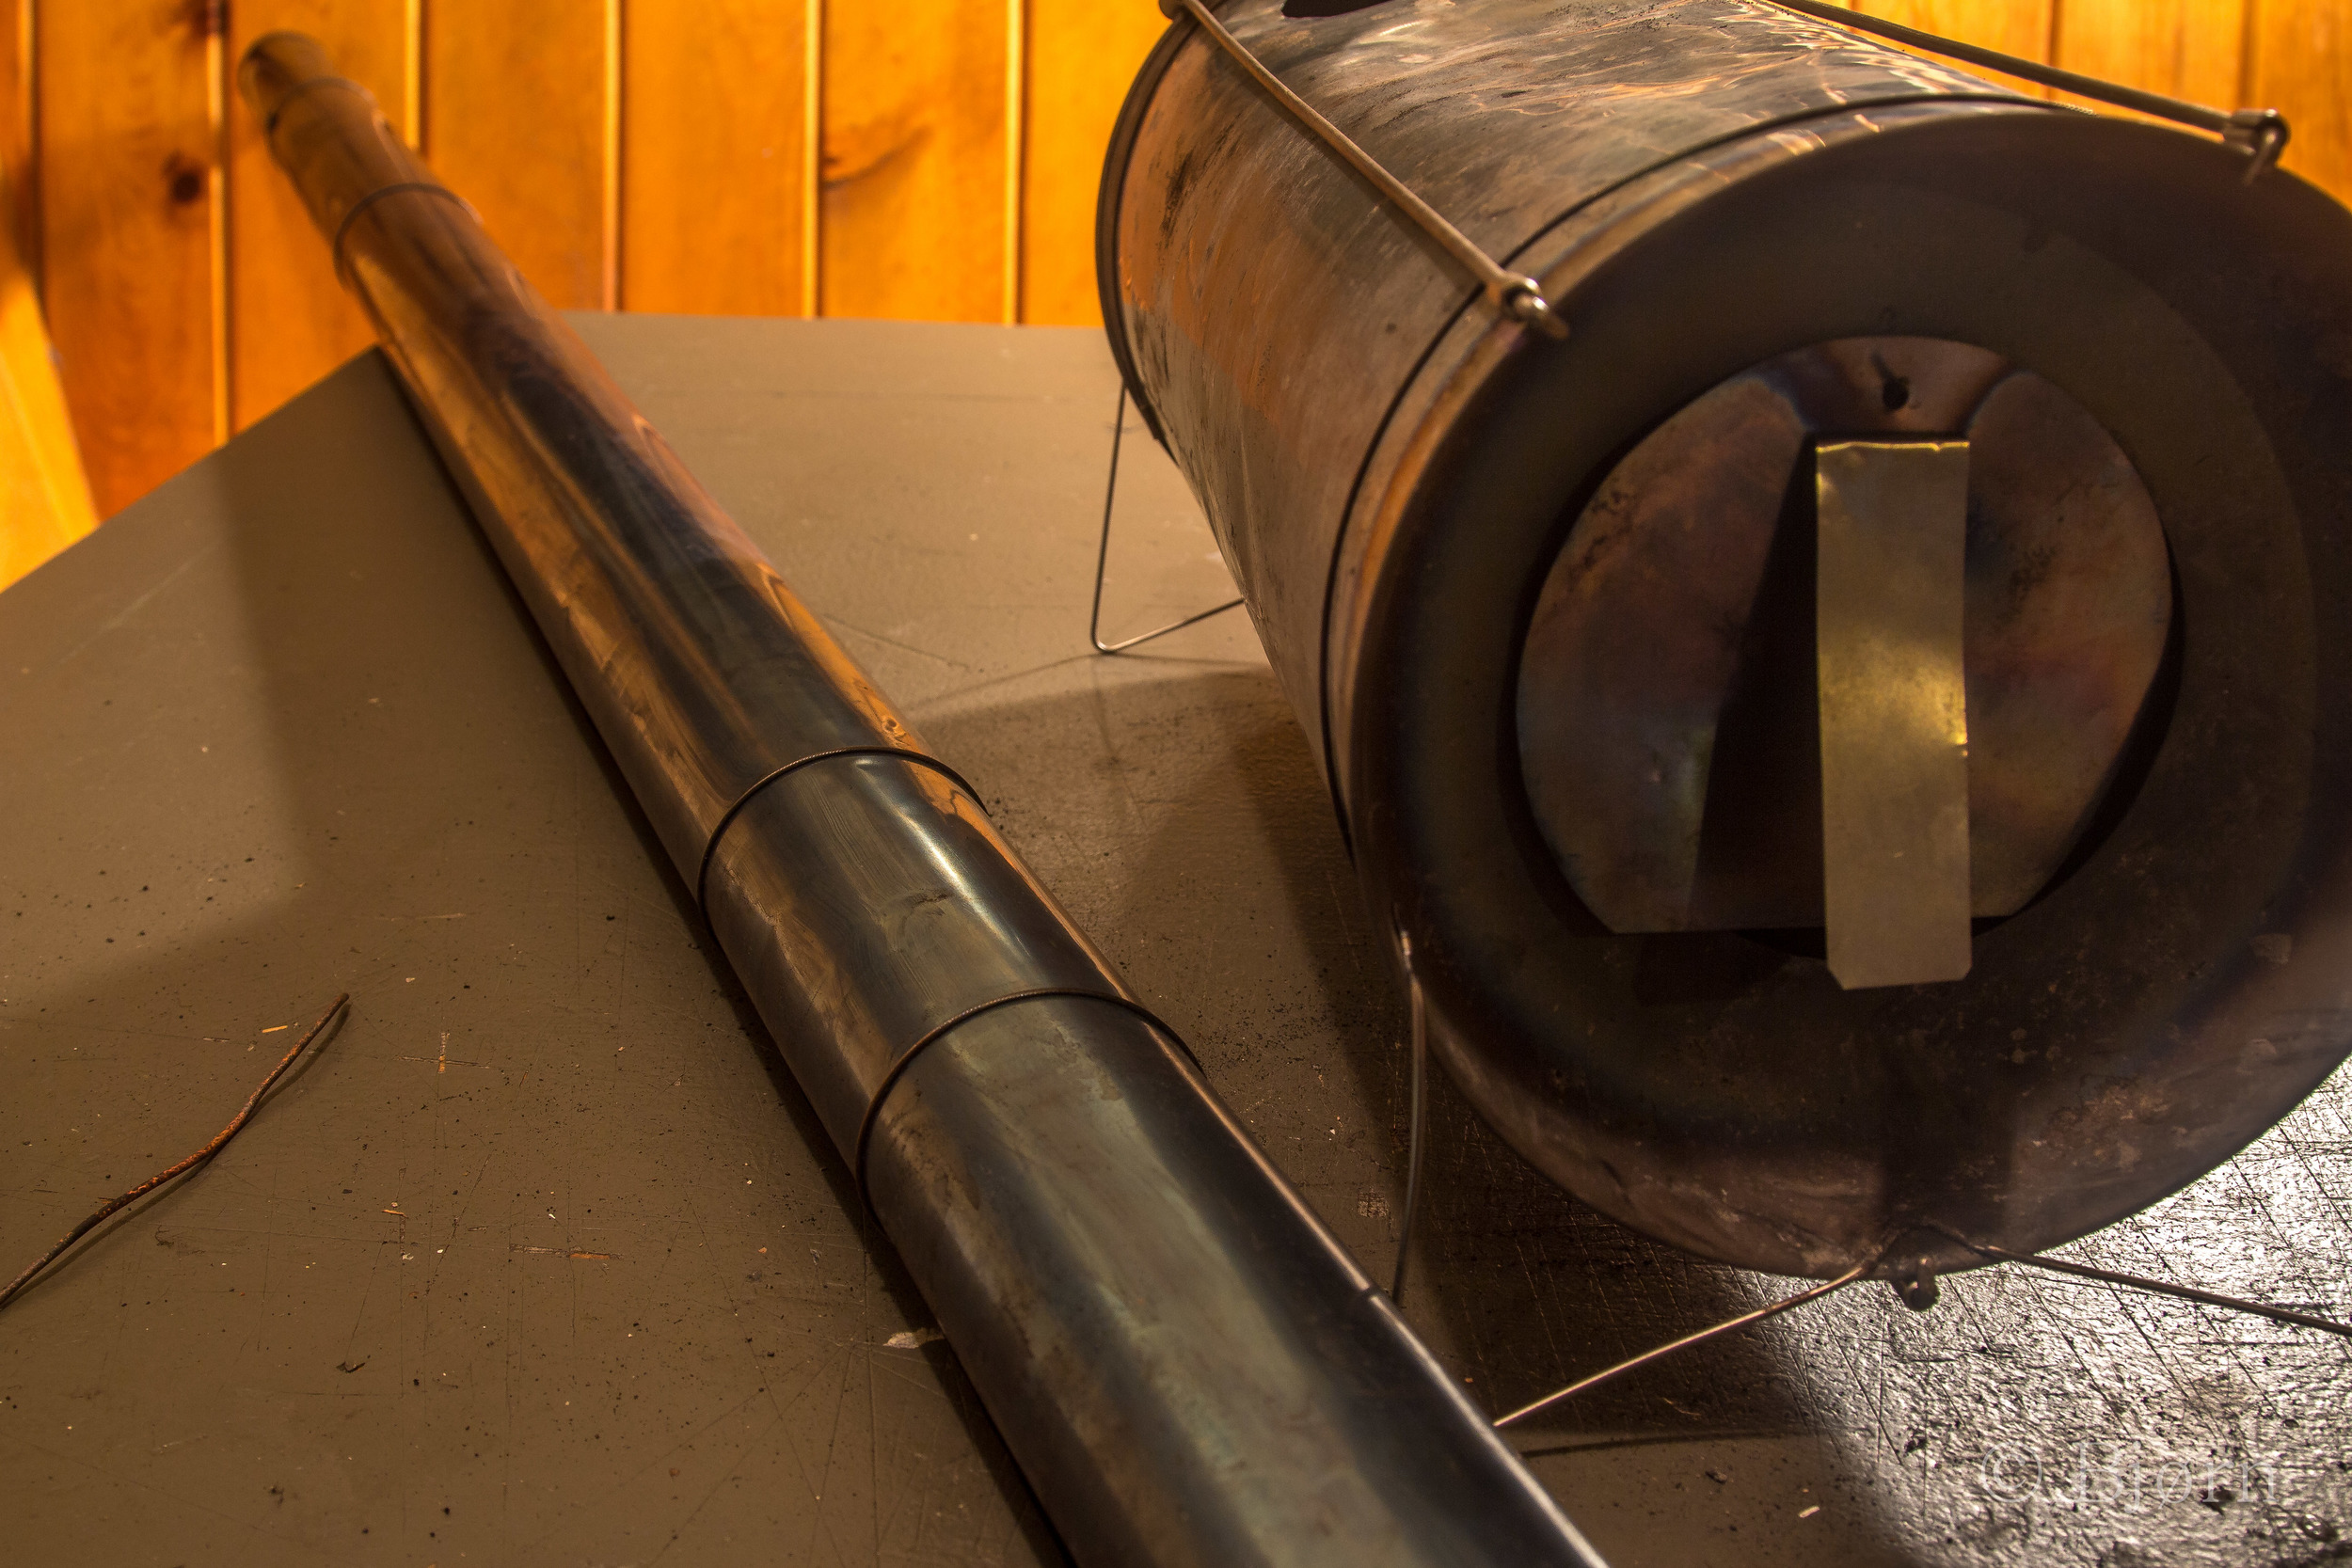
Titanium Goat makes very lightweight (2 pounds), collapsible and efficient, cylinder, wood burning stoves. For our upcoming adventure to the arctic we will be carrying the 22-inch long version in our retrofitted pyramid shelter.

IMG_3032.jpg


We decided to use Ground Truth Trekking’s old Mountain Laurel, silnylon, mid shelter, which we and Hig and Erin have used many times in the past. This may be the last hurrah for the shelter so we figured it would be a good one to experiment on. I also theorize that since much of the waterproof coating of this shelter has worn out, moisture may have a better chance of escaping through the fabric. 

 
IMG_3051.jpg

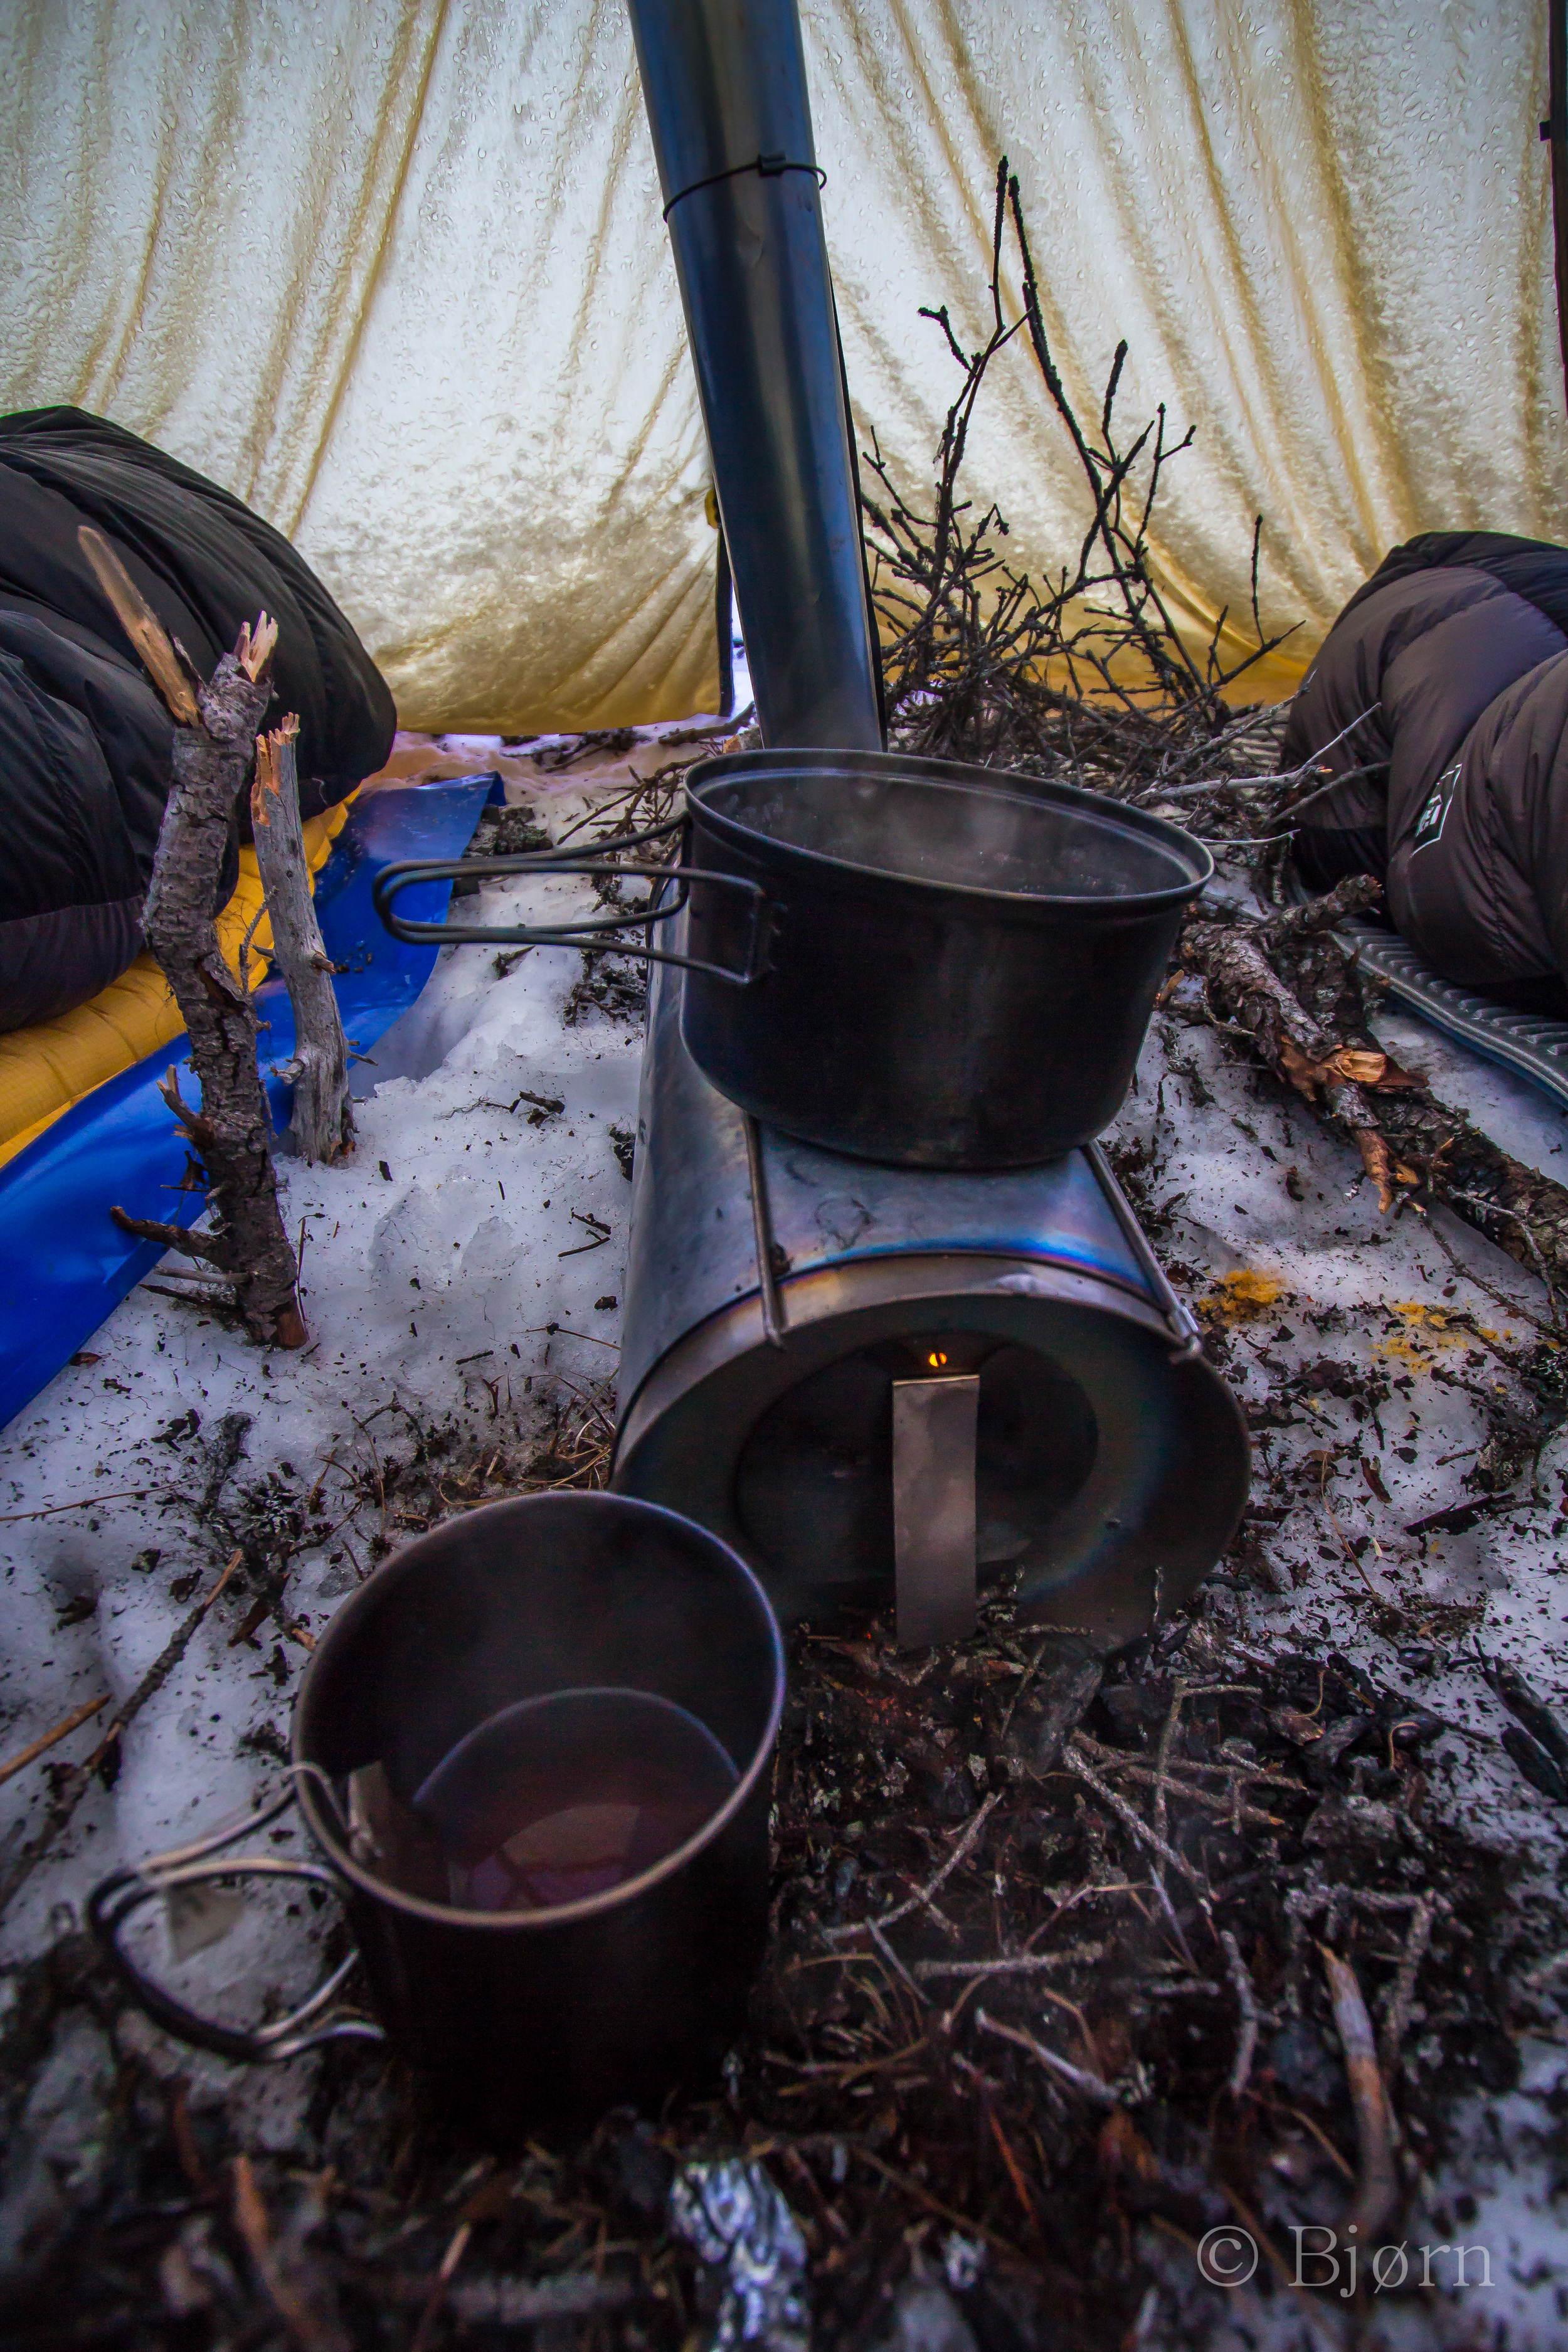
Our first task was deciding where in the shelter we wanted the stove and where the stovepipe should come out. We settled on having the stove in the middle with each of us sleeping on separate sides of the stove and center pole – allowing us equal access to heat. The stovepipe coming out of the upper, side triangle made the most sense.


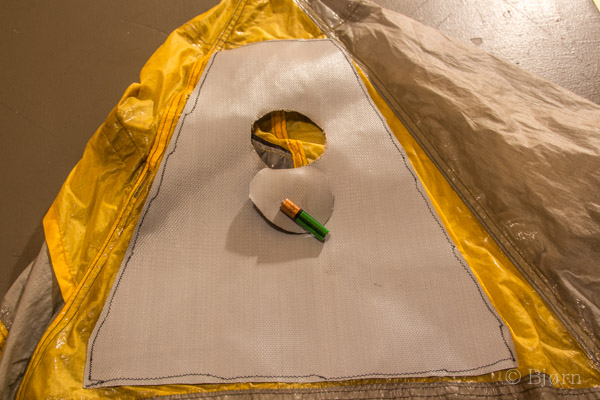
Once the location for the stovepipe was settled on I cut a piece of fireproof fabric into the triangle pattern of the shelter and cut out a hole for the pipe, leaving the circle un-cut at the bottom. Leaving the material hanging means we could cover the hole if we decide not to use the stove and it also acts as flashing for the stovepipe. Once the fireproof fabric was cut I pined it onto the shelter and sewed it on, using cotton thread and then cut out the silnylon.


IMG_3033.jpg

With that, the retrofit was complete and it was time for a test. Kim and I loaded our bikes and headed into the Caribou Hills for an overnighter. For a single night out we couldn’t have asked for better weather to run our trial under – we experienced coldish (10º) temps in the night and woke to a snow storm.


After pitching the shelter we set up the stove together. Kim stayed inside and lit the fire while I harvested wood. When cutting wood, I was trying to anticipate how much we would need for both the evening and again in the morning. I ended up estimating fairly well but imagine on our trip we will require a little more as we will need to fill two 64oz thermoses, dinner, hot drinks and breakfast each day. It’s hard to quantify this into volume but I would say three full armloads of burning wood and a supply of kindling seems about right.


First impressions are all positive. The stove only has one setting – on. There is no damper and the door does not allow for closing down. In a shelter that does not retain heat this seems fine and melting snow into water means you want the most heat as possible. Stoking is fairly constant, at least with the dry spruce branches we were using. Moisture from our clothing was soon dissipating out the top vent and partially opened door. Within an hour we both had full mugs of hot chocolate, dinner and damp clothing was dry. Before bed we melted another 50 or so ounces of water and let the fire go out.


The next morning was warmer and snowing. The falling snow created a unique problem – it melted onto the shelter and once we let the fire go out this turned to ice.  I believe the solution in this scenario will be to go out before the heat is gone and wipe or scrape the moisture from the shelter before it has a chance to freeze. Overall this is not too big of an issue as the next nights fire will dissipate the ice but it does make the shelter heavier and bulkier to carry.

Setting up the stove currently takes me around 5 minutes but I believe with familiarity we will be able to shave time.

IMG_3076.jpg
IMG_3075.jpg
IMG_3068.jpg
IMG_3070.jpg
IMG_3073.jpg
IMG_3076.jpg IMG_3075.jpg IMG_3068.jpg IMG_3070.jpg IMG_3073.jpg


Our model for the trip will be to alternate morning tasks. Every other morning one of us will wake up two or so hours before the other, light the fire and begin melting snow for the day’s water – a casual but persistent chore. This will also help dissipate moisture from sleeping bags and frost from the tent. We plan to alternate evening chores as well. One night one person cuts wood while the other prepares dinner and drinks. Both tasks keep you warm but the alternating keeps us fresh and in the past this kind of chore swapping has proved to be good for overall moral.


We have yet to experience strong winds with this setup but from what we have gleaned from others the stove seems to still work fine. The stovepipe outlet is well above the shelter and we saw no sign of rogue cinders coming back to melt holes. That said, I have little doubt that after six weeks on the trail our shelter will be pretty or hole free.


I also experimented with a lightweight bow saw that I made from a commercial blade and three pieces of thin, flat aluminum. Although the saw performed well enough for this trial run, I have my doubts. There is currently not enough tension on the blade and it wants to bend. We may end up bringing small folding handsaws. The jury is still in deliberation on this topic.


We are planning to rely solely on the wood stove for our trip and not bring a fuel stove. We will however leave my trusty MSR Whisper-Lite with Hig to send to us if need be. I imagine some camps will be harder than others to harvest enough wood but on all past trips I have found that as you go, people are generous with trail information. As is the case with all trips – you never know until you go.


Tags Titanium Goat, DIY, Fatbike, Alaska, Ground Truth Trekking, Camping, Expedition, Arctic
6 Comments

DIY Beaver Mittens

January 5, 2014 Bjørn Olson
IMG_2929.jpg

I have had for many years a pair of seal mitts that have performed amazingly well for winter cycling. Many people prefer to use pogies for cold weather riding and I too often find them useful, but on extended cold weather cycling expeditions actual cycling only accounts for some of the time and chore list. Setting up and breaking down camp typically happens during the coldest time of day. Warm mittens are needed throughout and with all things bike expedition, why carry two of something if one will suffice.


My very close family friend, who I consider an aunt, made my seal mittens - anana Umara.  She is Siberian Yupik and grew up on St. Lawrence Island learning to sew skins from her mother.


My mitts are made of fur seal and the fur is facing out on the top, thumb and underside of the forearm. The palms were originally made of tanned moose hide. With a few years of serious use the moose hide palms began to deteriorate. After debating options I decided to replace the palms with Cordura. This modern fabric is waterproof and tough. After two years, the repair has proven successful. As an aside, I enjoy the aesthetic – modern primitive.


My partner Kim has been without fur mitts and on previous winter expeditions her hands have suffered as a result. For this winters expedition we decided to amend her deficiency and bought a beaver pelt to sew into mittens. Beaver has coarse guard hairs but very dense ‘down hair’, making it warm and soft and a good choice for mittens.


My seal mitts were made of four individual pieces, hand stitched together with dental floss. I used this pattern and tried to mimic, as close as possible, the workmanship for Kim’s pair.


IMG_2887.jpg

Step one was laying out the pelt, tanned side up, and tracing a pattern. Once the layout was complete I used a razor knife and cut out the pieces of hide, making sure to only cut the hide and not the fur. I then moved to the cordura and cut out the palm piece.


Sewing fur has many tricks and I have much to learn, but one technique I picked up along the way was to sew through the hide, tanned side first. The other direction causes the needle and thread to bind with the fur and pull it through the stitch. This is time consuming and messy looking.

IMG_2896.jpg


I sewed the palm to the top piece of hide inside out until I reached the thumb and wrist intersection and stopped. I then turned the mitten right side out and attached the thumb piece with a few pins. Keeping the mitten right side out, I sewed the thumb on using a baseball stitch.


At this point I had three unfinished intersections - two at the thumb and one at the wrist. I then pined the final piece, the bottom of the forearm, and continued to sew with the baseball stitch right side out. Once all the seams were done on the bottom forearm, I turned the mitten inside out and finished the intersections.


IMG_2905.jpg

The mitten looked done at this point but there were a few steps remaining. A band of trim is needed at the opening, a tethering system and lastly I used a conservative amount of seam seal on the stitches.


For the trim I used a strip of one-inch cordura, overlapped the opening and hand stitched through the three layers. This piece of trim serves to protect the fur, is an attachment point for the tether and has a nice aesthetic.


Screen Shot 2014-01-05 at 12.48.00 PM.png

The tether I use is based on images I have seen from turn of the century polar explorers. I use one inch webbing and sew four pieces together at right angles making a rectangle shape, big enough to easily fit over your head with hat(s) and hood on. I then sew either webbing or chord to the middle of the ends of the rectangle slightly longer than shoulder to wrist and attach the other end to the cuff/trim of the mitten. The tether should be long enough that your range of motion is never restricted but not too long as to become a nuisance. These mittens are loose fitting and it is ideal to be able to shake them off when dexterity is required and then easily slip them back on.


Layering is the key to this kind of mitten.  Temperatures can fluctuate wildly on long winter trips. Being able to regulate is very important. The outer layer should be too big to be worn with nothing else but supple enough to work with only a thin liner glove. The liner glove is the first layer but all subsequent layers are mitts. I typically carry two home made fleece liner mittens - one thin and snug fitting the other thick and loose enough to fit over the liner glove and liner mitt. They should all fit together without constriction. For cold weather, tight fitting and constricting gloves and footwear are to be avoided at all cost, as this leads to poor circulation and eventually frostbite.


Many people have strong ethics and feelings against using natural furs for clothing. For me, this is a complicated issue. On the one hand I am against unnecessary cruelty and believe fur farms are often a terrible idea. On the other hand fur trapping is a small part of Alaska’s sustainable economy and there is no doubt that indigenous people figured out what works best against the cold. Every item we use in life has some hidden, external cost associated with it. I personally try my best to be ethical in my purchases and weigh out the pros and cons. For me, this beaver is sacred. I can only hope that it lived a fruitful life, had offspring and died without unnecessary pain. It will now live on and provide warmth to another being who is greatly appreciative. 


Beyond the mittens I also sewed seat covers for our bike saddles, using two pieces of hide and a tube of cordura around the bottom perimeter, with a chord to tighten the cover onto the saddle. In the past we have used sheepskin saddle covers with great results. I believe the beaver saddle covers will be an improvement over the sheepskin.

IMG_2943.jpg


Next blog post will be about retrofitting a floorless mid shelter to work with a wood stove.


​

Tags DIY, Alaska, Fatbike, Arctic, Winter Camping
8 Comments

For professional photo shoots, stock photography, videography or filmmaking, please email bjorn@groundtruthtrekking.org for prices and quotes.

Powered by Squarespace